A Very Glitzey Christmas Project
I found two projects that I
wanted to share with you today!
You will learn how to create your own
unique snowflakes to decorate your tree,
unique snowflakes to decorate your tree,
windows, Christmas Cards, and wreaths!
These projects are great for adults
and children to do together!
Ready? O.K.!!
Have fun with these today!
MAKE YOUR OWN SNOWFLAKES!!
Project One:
Glitter Snowflakes
Materials Needed:
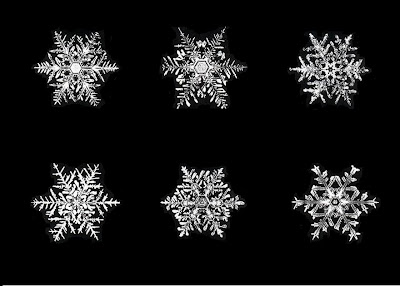
clip art sheets of snow flakes
plastic circle template
glitter glue
glue stick
card stock
Christmas paper
hole punch
ribbon
Directions:
Trace around the snowflakes
with a plastic circle template.
with a plastic circle template.
Trace the same size circle that
you traced for your snowflake on the
card stock and the Christmas paper.
you traced for your snowflake on the
card stock and the Christmas paper.
Add the glitter to your snowflake and let it dry.
Glue the snowflake circle onto the card stock circle.
Glue the Christmas paper circle onto the
back of the card stock circle to give your
ornament a festive look on both sides!
MORE TIPS!!!
Trace the circles of card stock
and the Christmas paper one size larger
than the circle of the snowflake.
For even more detail and dimension
to your snowflake ornament, you can
trace the circle for the Christmas paper
another size larger than the card stock circle!
Instead of using the printed Christmas paper,
substitute shiny, foil Christmas paper in
solid colors of gold, silver, red, or green paper
to glue on the back of the card stock circle.
For some Extra Pizazzzzzz,
You can also use the shiny paper to glue on
the front of the card stock before you
glue the snowflake on the card stock circle!
Use decorative scissors to cut the circles with
to jazzzzz up the edges of the ornament!
Add glitter to the Christmas paper that
is glued on the back of the ornament
is glued on the back of the ornament
for even more BLING!!
Use lace instead of ribbon for the tie on the ornament!
Use Glow in the Dark glue and regular glitter
on the black background/white snowflakes sheets !
Your kids will love the effect of glowing snowflakes in the dark!
Remember!!!
The clip art sheets have been reduced
in size to insure that all of the details
will fit properly on the screen!
You will need to save these sheets in the largest size.
Right click on the mouse to save and then
left click on image to save to largest size!
Finish by clicking on save picture as!
First Set of Sheets:
Black background/White Snowflakes
Second Set of Sheets:
White Blackground/Black Snowflakes
Third Set of Sheets
I tinted these sheets and the snowflakes to give you more colors
when creating your snowflake ornaments for your tree!
Project #2:
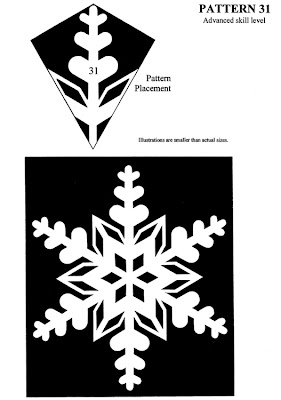
Make your Own Paper Snowflakes
I included the instructions for this project
along with the cut-out portion of the snowflake sheets.
Should you have a problem downloading anything on this post,
please do not hesitate to let me know and
I will make sure you get the sheets you wanted!
Please enjoy creating your own snowflakes
and have a wonderful day
filled with an enormous amount of
Christmas Cheer!
***All images are from the Dover Publishing Compnay!***
If you would like a free sampling from their huge
selection of clip art and vintage images
and start receiving your free bi-weekly sampler!


these are gorgeous..thanks!! Also, I am probably the only person over 50 who DOES NOT know how to cut out paper snowflakes..so I can't tell you how happy I am to get these detailed directions!! Bless you!!!
ReplyDelete